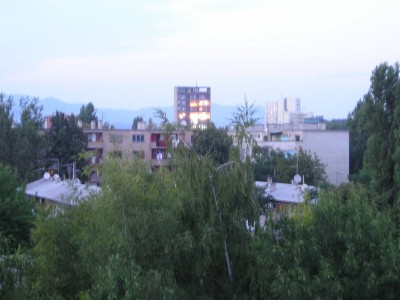
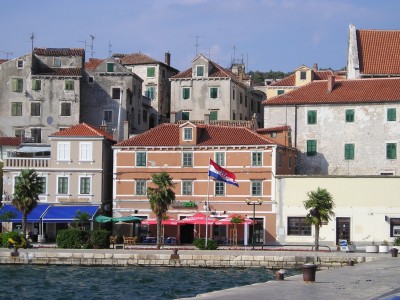
In 2003 my father bought a digital camera for the family. It was an Olympus C-350 Zoom, 3.2 mpix, 3x optical zoom, a 1.8″ LCD display. At that time, at least here in Croatia, having a digital camera was fairly rare. I’m not saying I had it first in my city, but it wasn’t as commonplace as today. This was such a leap from anything that you owned. You could actually take a picture and upload it to the computer. And the image was usually great if the light conditions were optimal, of course. Indoors, and with low lighting the images were terrible.

This camera wasn’t cheap. It cost a little less than $500. For Croatian standards of the time it was a fair amount of money. Still is actually, but that is the minimum you have to spend to have a decent camera, it was like that then, it’s still like that now.
I was making pictures of the town, taking it on trips, documenting everything. Since I was always a computer enthusiast I was beginning to worry, what if the hard disk failed? I’d lose all of the photographs I had acquired. There are people that seem to underestimate the importance of photos. You take the photos, they’re nice, but they’re not that valuable right at that moment. Looking back 10 years or more, suddenly the pictures become somehow irreplaceable. They’re a direct window into your past, not the blurry vision of the past that most of us have, but something concrete and immutable. I think this especially applies when you have kids, you’ll want the pictures safe and sound, at least for a little while. Everything gets lost in the end, but why be the guy that loses something that could be classified as a family heirloom?
Contents
How not to lose the pictures and how to organize them
Here’s a high-level list of what I’ve found to be good practices, to keep it organized and safe:
- A clear structure of stored photographs/videos. I’ve found that a single root directory with a simple YYYY-MM does the trick. I dislike categorizing pictures with directory names like
summer-vacation-2003,party-at-friends-house-whose-name-I-cant-rememberor something to that effect. I think that over time, the good times you had get muddled along the way, and you’ll appreciate a simple year-month format to find something or to remember an occasion. It’s like a time machine, let’s see what I was doing in the spring of 2004, and you can find fun pictures along the way. - This goes without saying, backups. Buy an external disk, they go cheap, and you can store a lot of photos there. Your disk can die suddenly and without notice, and all your pictures can simply vanish, never to be seen again. Sure, son, I’d love to show you pictures when I was young, but unfortunately, I couldn’t be bothered to have a backup ready and all the pictures are gone.
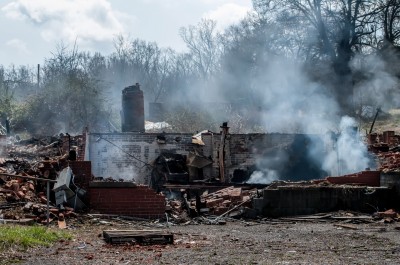
- Disaster recovery – imagine your whole building/house burns to the ground. You get nothing but rubble, and although you were meticulously syncrhonizing to your backup every night to an external HDD, everything is gone. Or more realistically, your house gets broken into and they steal your electronics which contain data that is basically irreplaceable. Create a tarball of all your photographs/videos, encrypt it with a GPG key or passphrase, or with a simple SSL encryption and upload it into the cloud of your choice. Even in the event of a burglary/arson with a regular snapshot of about once per two months, you’ll still be able to recover most of the data when you rebuild your house or buy a new computer in the event of a burglary.
- Print out a yearly compilation of pictures that you like at your local photo lab. Just pick like 40 of the best, with whatever criteria you deem fit. Who knows if the JPEG standard will be readable in 30 years time, but you can always look at a physical picture you can take with you.

Photos
Most digital cameras, be it video or still frames, have pretty lavish defaults with the image quality. This is a very good thing. I like to get a source file that is close as possible as the device has serialized it to a file. Still, if you take a lot of pictures, you’ll quickly notice that it’s piling up. The first thing to do is delete the technically failed ones. Do not delete the pictures where you think that someone is ugly on it, it may end up great in a certain set of circumstances. You never know.
These days even the shittiest cameras boast with huge pixel numbers, like 10, 15 mega pixels or more with a tiny crappy lens and who knows what kind of sensor. Feel free to downsize it to 5-8 mega pixels, with a JPEG quality of 75-80. Quickly you’ll see that now your images consume a lot less space on the HDD, I’m talking about 30% of the original photo, sometimes even less. I spent a lot of time trying to find exactly how the image is degraded. Some slight aberrations can be seen if you go pixel peeping, but screw that, the photos might have sentimental value on the whole, and you’ve saved a lot of hard drive space that you realistically have available. I recommend using the Imagemagick suite for all your resizing needs. Create a directory where you want the recoded images, like lowres:
$ mogrify -path lowres -auto-orient -quality 80 -resize 8640000@ *.jpg
You can set the number of pixels, in this example it’s 8.64Mpix. Choose a resolution and go with it. I generally use 3600×2400 which is 8640000 in pixels. Mogrify is great for this task, it can encode the images in parallel, so if you have a multi-core computer it really shines since the operations involved are very CPU expensive. You can omit the -path switch, and the files will be processed and placed instead of the file, but be careful as this WILL overwrite the original file(s). Don’t test around on your only copy of the file. You can use the generally more safe convert which takes the same argument with a slight difference, it needs the INFILE and OUTFILE argument:
$ convert -auto-orient -quality 80 -resize 8640000@ mypicture.jpg mypicture-output.jpg
or
$ for JPEGS in *.jpg ; do convert -auto-orient -quality 80 -resize 8640000@ $JPEGS $JPEGS-out; done
The problem with this is that you’ll then have a bunch of IMG_xxxx.jpg-out files. This is the longer way around, but once you’re satisfied with the result, delete the original jpeg files and rename it with a program that mass renames or you can use a perl script called ren, my brother and a buddy of his wrote a long time ago and it still works great for a number of circumstances:
$ ren -c -e 's/\-out//'
This will rename all the files that have the -out to empty string, deleting it from the filename essentially. But this is the long way around, I suggest using mogrify. Mogrify had a very very nasty bug. At one point they decided that it would be cool if you have an Nvidia card and the proprietary drivers installed it would use the GPU for all your encoding needs. That sounds great in theory, but I actually had an Nvidia graphics card with the drivers properly installed. How do I know that? Complex 3D video games worked without issues. And guess what else? It didn’t fucking work. It simply hang there, and didn’t do anything, it would never finish a single image. Did I mention that you can’t fallback on the CPU so easily, I mean at all? I googled around, and multiple bugs were filed. I just tried mogrify now when writing this post, seems they have finally fixed it, and I may go back to using it again, instead of unnecessarily complex python scripts that called concurrent converts which number was based on the number of your physical cores.
Video
A nice feature of modern cameras is its ability to record decent video and audio. The cameras mostly use a very good quality preset for the recordings. On my current SLR camera I get 5-6 megabytes per second for a video. Not only that the files are monstrously huge, they also are sometimes in non-standard containers, have weird video and/or audio encodings. You should really convert it to something decent:
$ ffmpeg -i hugefile.mov -c:v libx264 -preset slow -crf 25 -x264opts keyint=123:min-keyint=20 -c:a libmp3lame -q:a 6 output.mkv
This produces a pretty good quality video. I am strongly against rescaleing the video in any way. Use the original resolution, the displays are advancing at a stable pace, you don’t want to unnecessarily scale down the resolution. You can change the quality with -crf from 18-29 are reasonable options, I discussed it in another post in more detail. Also, it decreases the file size by a factor of 15 or more, virtually without perceptible visual loss. As an added bonus you mux it into an open source container with the h264 family of encoders and the venerable mp3 format for audio. That should work on most computer players by default as well as standalone players hooked up to a TV.
I started this post as more of an in-depth technical overview how to store and encode your multimedia and backing it up. But instead I chose to give a high-level overview of what worked for me over the years. Make backups regularly, have a disaster recovery option present if at all possible, and print out some yearly photos. It’s fun to look over the physical pictures, and can be good fun showing it to visiting friends and family. When deciding how much to shrink the files, always keep in mind that you should compress them as much as possible while keeping the subjective perception of the quality as close as possible to the original. What I mean to say, don’t overdo with the quality settings. What matters is how much space is your archive consuming right now, and how are you able to cope with that amount of data.
Data loss is commonplace. Hard drives fail, do not lose 10+ years of photographs because you didn’t have a decent backup. It’s not so hard. Do it now. Don’t lose a part of your personal history, it’s priceless, and cannot be downloaded from the internet again. Always encrypt your stuff before uploading to the ethereal cloud. Maybe you have sensitive pictures that you wouldn’t want anyone else casually looking over just because they happen to be the sysadmin. You wouldn’t make the same kind of privacy breach in other parts of your life, would you?


One thought on “Handling large sets of photographs and videos”