Tag Archives: linux

Simple symmetric encryption

Encryption. It’s one of those words that programmers and sysadmins dread. Always the complications, always the overhead. There is an entire science and math behind encryption, and if you think about it more closely, it makes sense that it’s so complicated. Imagine that you are in a room full of people and you need to say something to your wife that you don’t want anyone else to understand, but they’re all listening. “Honey, are we having sex tonight? Please? – C’mon, we had sex two weeks ago, what do you want from me?”, the wife answers. But if the conversation goes like “Ubarl, ner jr univat frk gbavtug? Cyrnfr? – P’zba, jr unq frk gjb jrrxf ntb, jung qb lbh jnag sebz zr?”, it would be much harder to understand. This is a simple ROT13, but chances are people won’t understand and chances are you won’t be able to pronounce it anyway. Computer encryption works similarly, but needs to set the encryption keys in plain view of everyone, but the implementation is beyond the scope of this article. Take a look at this article for a better explanation.

The cloud & you

In a recent post I spoke briefly about encryption and the omnipresent cloud, but didn’t really get into it. The article is entertaining the idea that you keep a monthly snapshot of all your pictures or something else valuable on a cloud provider, like Dropbox or Google Drive. The point is, keeping possibly sensitive data somewhere that any bored sysadmin can casually go over your files is a bad idea. All you have is their pinky swear that they won’t do such a thing. Your account can get hacked, as we all saw is perfectly possible with the recent “The Fappening” incident. It’s a bad personal security breach. The best course of action is to nip this scenario in the bud, and simply encrypt your stuff before sending over to a cloud provider.

How to easily encrypt your files? The easiest method is using a symmetrical encryption with openssl. You could use GPG, have a complete set of private/public keys, etc. This complicates matters considerably, and you’re screwed if you lost your private key. If this is a case where you offload an encrypted tarball somewhere, and you lost your equipment, better have that 4096-bit key memorized. What we’ll do instead, is use a regular strong password. Remember, we’re not trying to make it as secure as possible, we’re just making it so not every Tom, Dick and Harry from your friendly cloud provider can view your files if they feel like it. This is by far the fastest and easiest way.

Encrypting:

$ tar c documents | openssl aes-256-cbc -in /dev/stdin -out documents.tar.ssl
enter aes-256-cbc encryption password:
Verifying - enter aes-256-cbc encryption password:

That’s it! Your files have been encrypted. Feel free to throw in z or j to tar because openssl won’t compress data. Also, openssl salts by default, so you don’t have to worry about that. Upload the tarball and you’re done. Of course, keep the password to at least 8 characters, no dictionary words, birthdays, use special characters, etc.

Decrypting:

$ openssl aes-256-cbc -d -in documents.tar.ssl | tar x
enter aes-256-cbc decryption password:

This will decrypt your files. There is one big caveat with this. Say your photographs, or important personal projects consume a lot of space, like 20 GB and have a lot of files. Making a single encrypted tarball every month is OK, but uploading a brand new snapshot from your Cable/ADSL line isn’t. I personally use pycryto, it’s a python script I wrote to recursively encrypt all the files within the current directory, delete the original by default, and replace them with .enc files which are encrypted with your password. The timestamps and permissions are preserved, but in the metadata of the files themselves, not contained in the encrypted files. Even still, it’s very rsyncable like this. I have a copy of my photographs on this very server.

Conclusion – if there is any

Why go through all this trouble? They’re just pictures? That part is true, if it’s only pictures, and not an offsite backup of your important work projects that might not be viewable for everyone. It’s more of a principle. And I realize that this way is not cryptographically the best way possible to encrypt your data, but I feel that it’s good enough so it’s not viewable by default. Plaintext sucks. Also, there’s a pretty good chance no one will ever get to see your files, because they don’t do it in general. I’m a sysadmin too, I have access to sensitive data, but I view it as important cargo. I don’t give a flying fuck what’s in it, I really don’t. It’s all just so unimportant for me to actually take a peak. There’s nothing to gain. I have a job to do. I’ve had various jobs throughout my life, from splitting rocks in a quarry, to basic ship maintenance (sanding the chemicals that make it harder for underwater life to latch on to the ship), hauling around cargo, mostly menial jobs. But I’ve always held the same stance. There is nothing to gain from stealing or cheating anything or anyone, you’ll only get a bad rap if you’re caught, and you have to look yourself in the mirror even if you don’t get caught. Not sure how the people that engage in those activities reconcile with their inner-self.

Recording a game video with Linux

I’m sure a lot of people have always thought, wow, I’d like to record a video of this to have it around! On Linux! Well, with it’s incredibly easy! OK, not really so easy, you’ll have to handle a few hurdles along the way, but it’s nothing terrible. As an example I’ll be using prboom which is an engine to run Doom 1/2 with the original WADs you have obtained legally, paid for fair and square etc. It uses 3D hardware acceleration, no jumping, crouching and shit like that. It’s great to see Doom 1/2 in in high resolution, it looks pretty good, and very true to the original, and makes the game more than playable.

Requirements

There is a beautiful program called glc. Basically it hooks to the video & audio of the system and dumps a shitload of fastest compressing png files, that is one per frame. Depending on the resolution you use for capturing and the framerate, expect very hardcore output per second to your HDD, somewhere around 50 megabytes per second for a full hd experience, and that’s with the quicklz compression method for glc-capture.

I won’t go into too much detail how to install glc, or prboom. I’m sure it’s simple for your favorite Linux distribution. It was a simple aurget -S on Arch. Now,let’s head on to actually capturing some gameplay. The syntax is very simple glc-capture [options] [program] [programs' arguments]:

The initial video capturing

$ glc-capture -j -s -f 60 -n -z none prboom-plus -width 1920 -height 1080 -vidmode gl -iwad dosgames/DOOM2/DOOM2.WAD -warp 13 -skill 5

This was the tricky part, I had to play around with the options to get it glitch free inside the game. I’ve recorded a video three years ago with glc, can’t remember using some of these options. -j – force-sdl-alsa-drv, got better performance, but maybe unneeded, play around with it -s – so recording starts right away -f – sets the framerate -n – locks FPS, didn’t need this before, but you get a glitch-free recording -z none – no PNG compression, I’ve had better performances without compression The prboom-plus options should be self-explanatory, I’ve used the 1920×1080 resolution so it’s youtube friendly. The -warp is to warp to level 13, and -skill 5 is for nightmare. The file output is named $PROGRAM-$PID-0.glc by default.

OK, the easy part is done, apart from the tricky part. Now you have a huge-ass .glc file on your hard drive that is completely unplayable by any video player known to man. And when I say huge-ass, I mean huge-ass. A 54 second video comes out to 1.79GB, which is 34MB per second in 720p, and for 1080p I had up to 42MB per second! The default png compression used by glc-capture is quicklz. For 1080p I had some better experiences using -z none so it simply dumps the PNGs into the file and that’s it. As you might figure, this will also increase the resulting file size, but it could be well worth the disk space if you don’t have a fast CPU. You’ll get close to a 100 MB/s for a 1080p stream. Use the default compression if in doubt. Experiment.

What do we do with an unplayable, unusable, unuploadable gigantic glc dump on our hard drive? I strongly suggest you encode it somehow. I used to use mencoder for all my encoding needs. Due to the way it’s maintained, or a lack thereof, I switched to ffmpeg which has an active development and used a lot in the backends of various video tube sites around the internet. OK, let’s go, step by step:

Extract the audio track

$ glc-play prboom-plus-12745-0.glc -a 1 -o 1080p.wav

This line dumps the audio track from the glc file, of course it’s a completely uncompressed wave file. -a 1 is for track #1, and -o is for output, naturally.

Pipe the uncompressed video to ffmpeg and encode to a reasonable file format

$ glc-play prboom-plus-12745-0.glc -o - -y 1 | ffmpeg -i - -i 1080p.wav -c:v libx264 -preset slow -crf 25 -x264opts keyint=123:min-keyint=20 -c:a libmp3lame -q:a 6 doom-final-file.mkv

-o - dumps it to STDOUT, -y 1 is for video track 1. Now we have used the all might unix PIPE. I love pipes. In this case ffmpeg uses two files as input, one is STDIN, that is the hardcore raw video file, no pngs, just raw video. The other input is the audio track we dumped earlier. This could be streamlined with a FIFO, but that’s overcomplicating things. The rest of the ffmpeg options are beyond the scope of this article, but they’re a reasonable default. The final argument of ffmpeg is the output file. The container type is determined by the file extension, so you can use mp4, mkv, or whatever you want. After this, the video is finally playable, uploadable, usable. Congrats, you have just recorded your video the Linux way!

If you do want to customize the final video quality, take a look at the the ffmpeg documentation at what these mean. The only thing of interest is the -preset and the -crf. The crf is the “quality” of the video. I was astounded that 2-pass encoding is a thing of the past, and it’s all about the crf now. It goes from 0 to 51. And only a small part of that integer range is actually usable. I simply cannot relay the beautiful wording from the docs, so I’ll just paste it here:

The range of the quantizer scale is 0-51: where 0 is lossless, 23 is default, and 51 is worst possible. A lower value is a higher quality and a subjectively sane range is 18-28. Consider 18 to be visually lossless or nearly so: it should look the same or nearly the same as the input but it isn’t technically lossless.

Details like these can really brighten a person’s day. 18 is visually lossless (and no doubt uses a billion bits per second), but technically only 0 is lossless. So you have a full range from 0 to 18 that is basically useless. Of course, it goes the other way around. After -crf 29 the quality really goes downhill.

The resulting video can be found here or you can see it on YouTube. Excuse my cheating and my dying so fast, this is for demonstration purposes.

Conclusion

I realize there are probably better ways of accomplishing this, you can google around for better solutions. Glc-capture supposedly works with wine too, with some tweaks. I haven’t really tried it, but feel free to leave a comment if someone had any experience with it. This is a simple way to make a recording, you can edit it later once you encode the file to something normal. Glc also supports recording multiple audio tracks so you could also record your voice with a microphone and mash it all together. Good luck with that. :)

Creating panoramic photos

You might have seen some nice pictures around the web that have been taken with a simple compact camera, but they have an astonishing amount of detail. You may wonder, how do they get such a nice, detailed picture? They simply stitch them together. How, you might ask? Do I need to shell out hundreds of currency in order to obtain the latest from Adobe and the likes? Nope, once again free software to the rescue, and it’s incredibly easy!

Step 1

Take the pictures. Bear in mind that they need to overlap, which should really be obvious. A good rule of thumb is to have at least 50% of the picture to overlap with the previous picture. Remember, no one says you can’t take the photos in the portrait mode. It would be a good idea to lock the white balance to a reasonable preset, so the camera doesn’t decide that picture has gone from “cloudy” to “sunny”. Although, not really necessary, as hugin has very advanced features to compensate. Also, you’ll want to lock the exposure so it doesn’t vary between the shots. Once again, this isn’t a problem for hugin, but it might improve your panorama. You can stack an arbitrary grid of pictures, for example 2×3, 3×3, 4×2, etc. For the sake of this article, I used the almost automatic on my EOS 100D with a 40mm pancake lens:

I used the portrait orientation for taking the pictures. I just snapped them and uploaded to my computer.

Step 2

Install Hugin that undoubtebly comes with your favorite distro, or if you’re a Windows user, simply download from their website. Now, I should point out at this time that Hugin is a very feature-full and complex software. The more advanced features are beyond the scope of this article, and quite frankly they somewhat elude me. Anyway, before I get too side-tracked, fire up Hugin, click on Load images, then on Align, and finally Create panorama, choose where you want the stitched photo to end up. There is no step 3:

Beautiful view of Zagreb

Hugin took care of the exposure and the white balance. You should really use the tips from above, though.

Conclusion

You’ll tell me, but MrKitty, there is wonderful software out there that is waaay better than Hugin, or Hugin is a very advanced tool that you have no idea how to use. Very much true, but the point of this 2-step tutorial is to point out to people that Linux and the associated software CAN be user friendly, and sometimes even more powerful than their proprietary counterparts. I’ve been using Linux for a while now and I sometimes get the question, but why are you using Linux instead of Windows? There is no easy answer. For starters, I work as a Linux sysadmin for a living, so that’s one, though I don’t really need anything more than Putty. It’s the little things, stuff like Hugin, it’s the plethora of programs that are available with your friendly package manager, the ability to write simple code without the need for big frameworks and the like. Try looping through a couple of files and doing something on Windows. You need specialized software for every little thing you want to do.

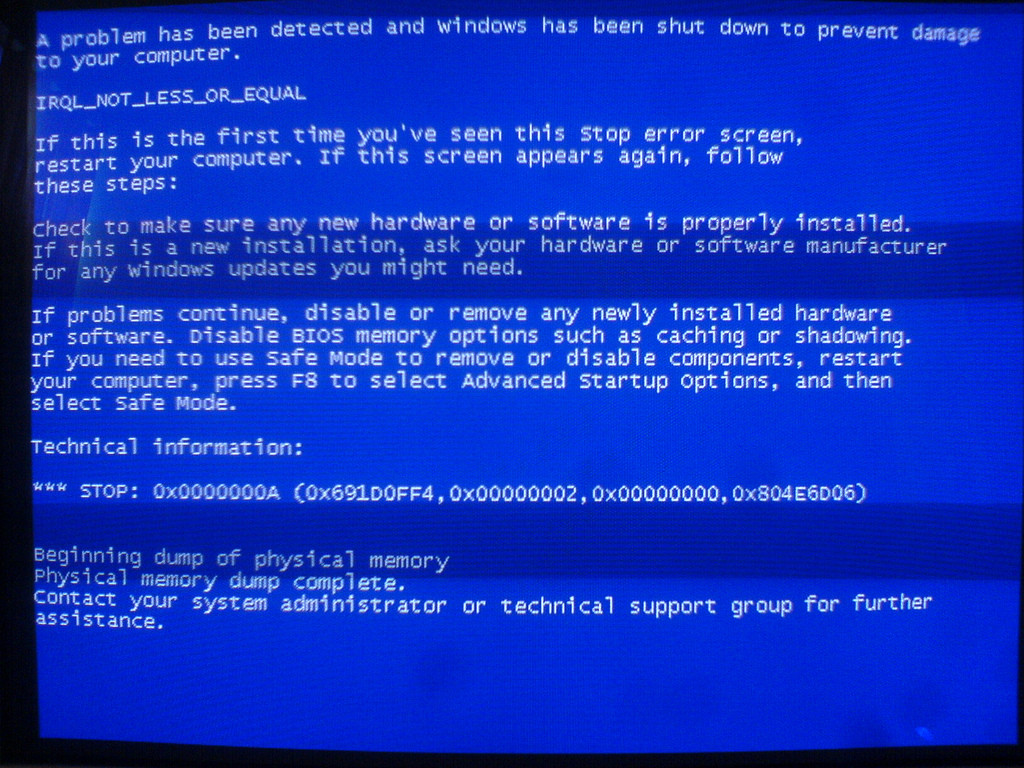
But MrKitty, you’re a power user, you sometimes code, you’re a professional in the field, of course you like Linux better! Well, I don’t really have anything against Windows, or Mac, or whatever. But I think everyone is forgetting just how much Windows can be a pain in the ass. I won’t even go for the low shots like BSOD.

Billions of dollars have gone into making this as user friendly as possible

OK, forget BSOD, there are other stuff that Windows lovers might forget. I’m sure everyone cherishes those sweet moments when you’re battling with drivers. I used to fix computers for money. You wouldn’t believe the stuff I would see. The latest one, a colleague of mine asked me to help him out with a mobile USB dongle. The laptop was running Windows 8, I think. Wow, I really lost the touch with the new Windows, in my mind Windows XP is the latest and greatest. Took me a while to actually find the control panel. OK, the drivers were somehow screwed up, even though Windows 8 was supposed to be supported. There was enough signal, the connection was active. Nothing was loading. Pinging 8.8.8.8 seemed to work, but resolving anything did not, even though the DNS settings were correct. A couple of hours of headbanging and googling revealed a nice forum in Polish with people with the exact same problem, and to my surprise there was a solution at hand. A new and improved driver download from somewhere, creeping at a nice 3 – 10 kilobytes per second and it worked, after tweaking the endless carrier-specific options. So yeah, Windows are really user friendly. I have no idea if it would work on Linux.

Anyway, my mother, age 69 is using Linux and loves it. My wife says she can’t imagine ever using Windows again. :)